

How To Create Web Application In Sharepoint 2013
I'm going to create a new SPWebApplication called which answers to the url sharepoint.local on my dev box / lab environment. I will have the SPWeb Application answer to http://sharepoint.local in my lab environment. I have already performed the necessary loopback registry settings changed for my Lab environment. I learned how to do that via the excellent Technet articles on that topic.
First I Go Te Central Administration
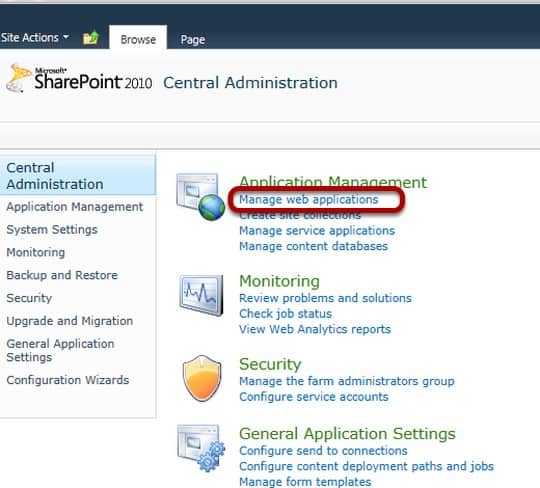
I am using Central Administration in this case but the SharePoint Management Shell is also an option (PowerShell). I will click on Manage Web Applications.
Now I create a new SPWebApplication
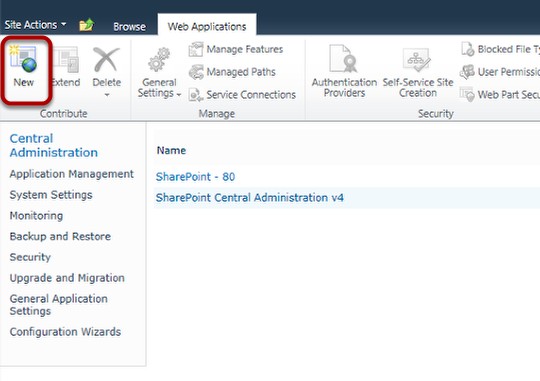
To create a new SPWebApplication I will click the New Button in the Ribbon.
Next I fill out the Form according to the required settings
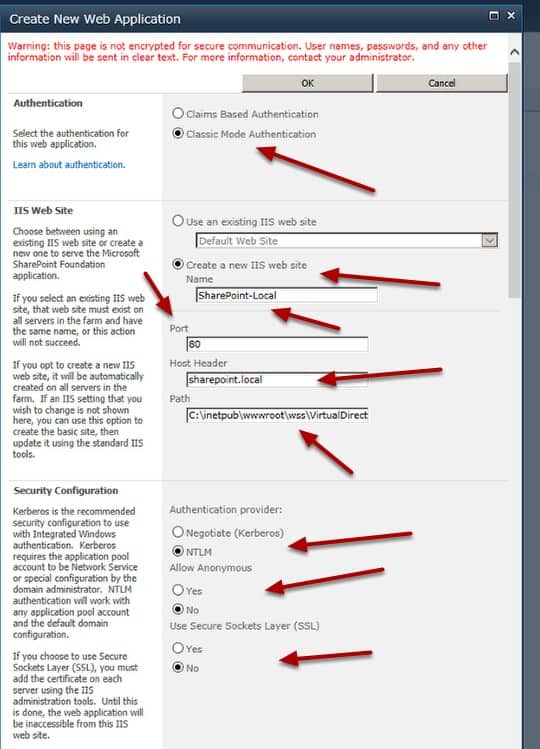
In this case since this is in a Development / Lab environment, I will keep the default classic mode authentication settings. I change the name of the IIS web site to something I will recognize when looking in the IIS Administrative tools. I change the Port to 80 since I will be using Host Headers and I add the Host Header sharepoint.local. I will need to add an A record to my DNS settings (not shown) in order for this to resolve. I leave the path at the default which is fine for my Lab environment. I leave the Authentication provider, Allow Anonymous and Use Secure Sockets Layer(SSL) at their defaults.
I Continue Filling Out the Form
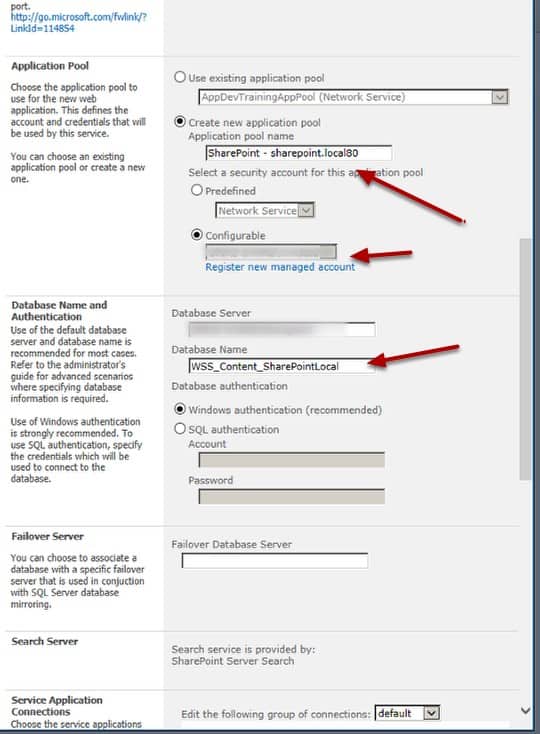
I will create a new Application pool and choose an existing managed account. I don't always choose a new application pool, in fact, I normally don't but in this case I wanted to have a separate one in case I do anything with this Web Application that I don't want to affect the others running on this Lab machine. I change the Database Name (getting rid of the GUID) so that it is : WSS_Content_SharePointLocal I leave the defaults on the Database Authentication section.
Set the Service Application Connection
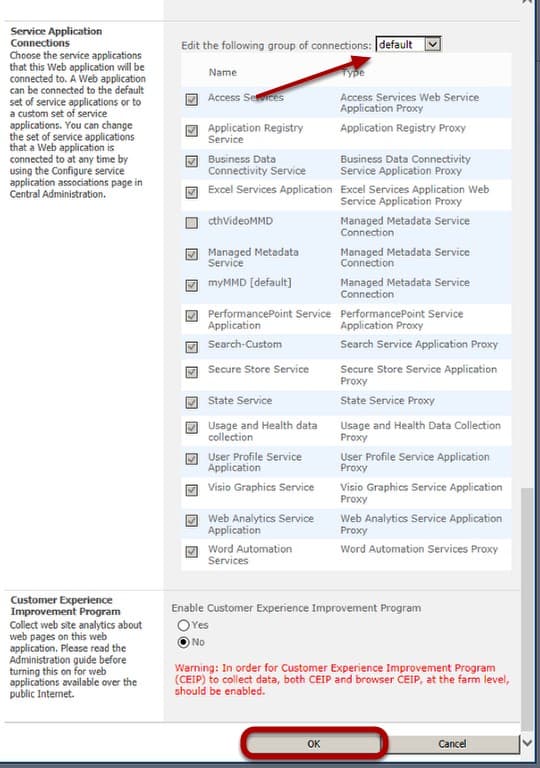
I use the default Service Application Proxy group. I have created a few Custom Service Application groups on this Lab Machine, but even if I was on a different Lab Machine, I would use that machines default group. I choose No for the Customer Experience Improvement Program (since this is a Lab Environment) and then click OK.
I now Create a Site Collection
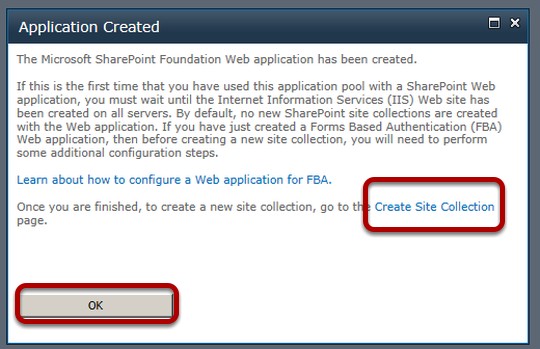
I click the Create Site Collection Link and then click OK
Fill out the Create Site Collection Form
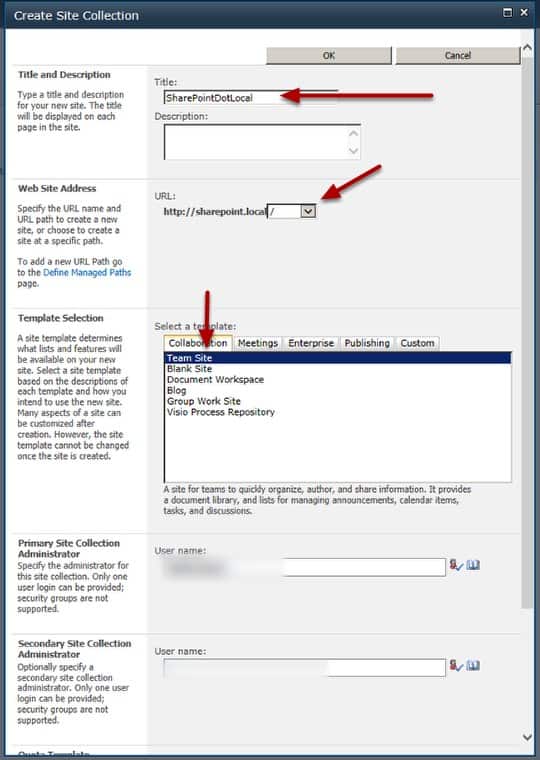
I create a Site Collection choosing a Team Site as the top level site template. I use the explicit managed path / and add the appropriate Site Collection Administrator(s)
Validate that everything worked
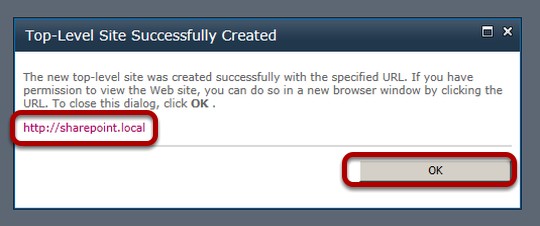
I click the link and if my DNS settings are correct I will be taken to the home page of the top level site of my new site collection.
I can now begin using my new team site
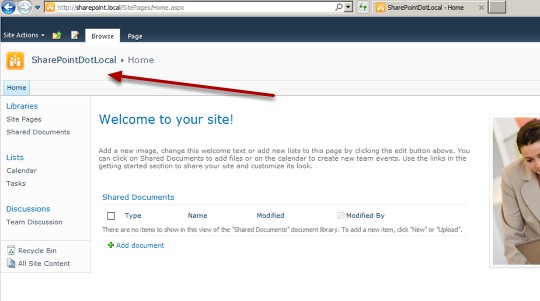
Once I validated that, I can get to my new SPWeb site and will go to the browser settings and add it as part of the intranet. This normally prevents me from having a bunch of issues when adding new documents etc…
How To Create Web Application In Sharepoint 2013
Source: https://www.interfacett.com/blogs/creating-a-new-web-application-using-central-administration-sharepoint-2010/
Posted by: garciawhar1968.blogspot.com
0 Response to "How To Create Web Application In Sharepoint 2013"
Post a Comment